 Remodeled AI
Transform Your Space with Remodeled AI: A Step-by-Step Guide
Published Jun 20, 2024
Welcome to Remodeled AI! This guide will walk you through a complete room transformation using our Remodel and Virtual Staging tools. These tools complement each other perfectly: the Remodel tool provides an excellent starting point by upgrading the overall design, while the Virtual Staging tool allows you to add personalized details and final touches.
Step 1: Remodel Your Room
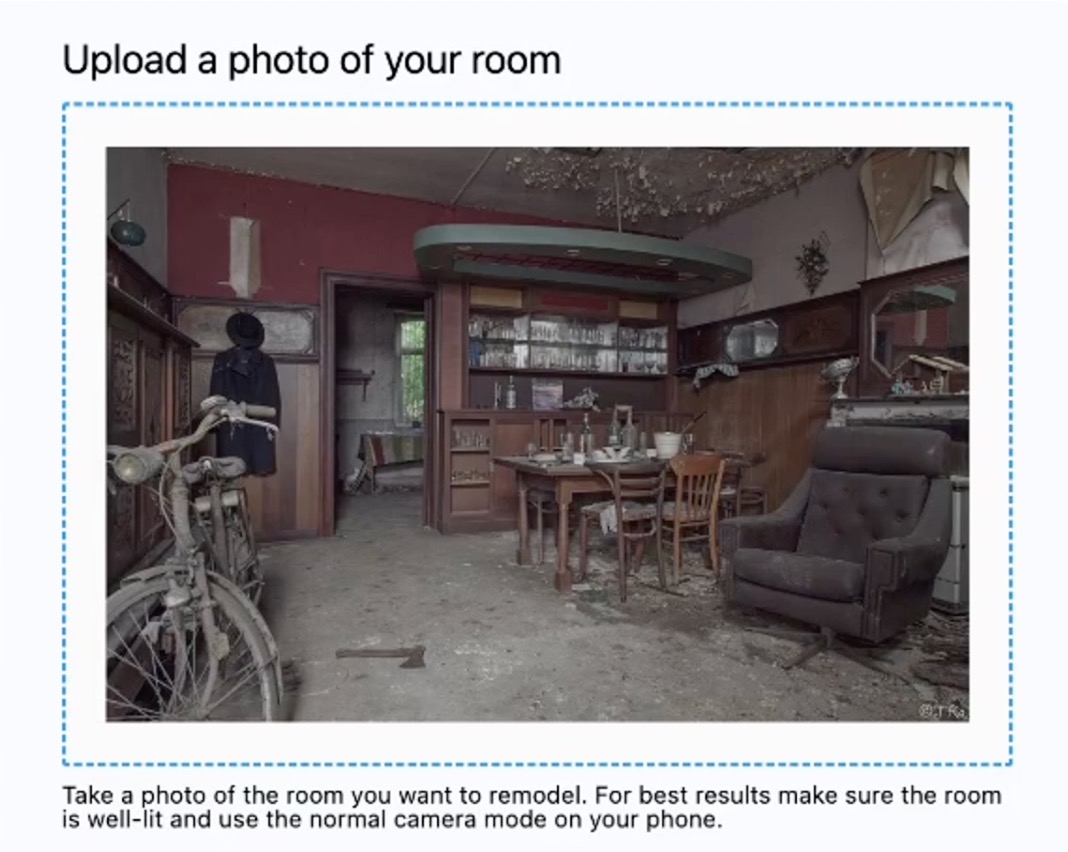
Navigate to the Remodel Tool
Begin by selecting the remodel tool from the left sidebar. Upload an image of the room you want to upgrade. For this demonstration, start with an old, dusty room as the base.
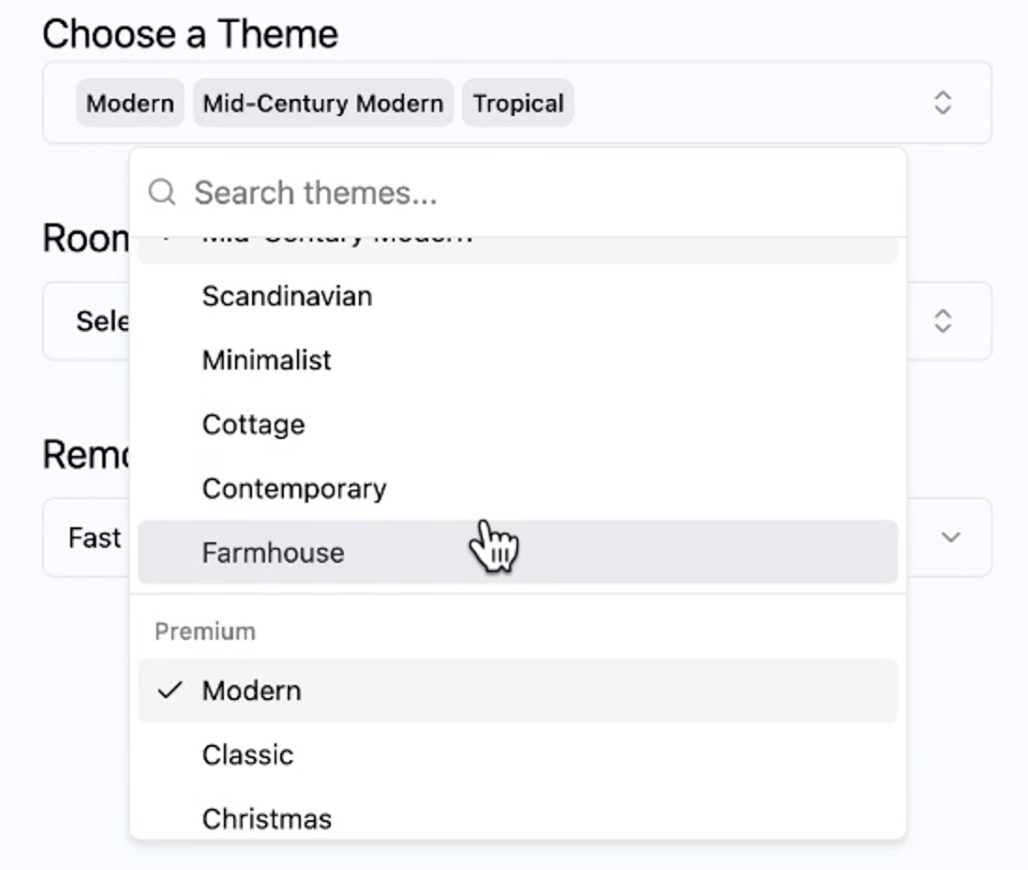
Choose Your Themes
Explore various themes to find a combination that suits your style. For this example, blend modern, mid-century modern, biophilic elements, and a touch of tropical flair. Select the living room as the room type.
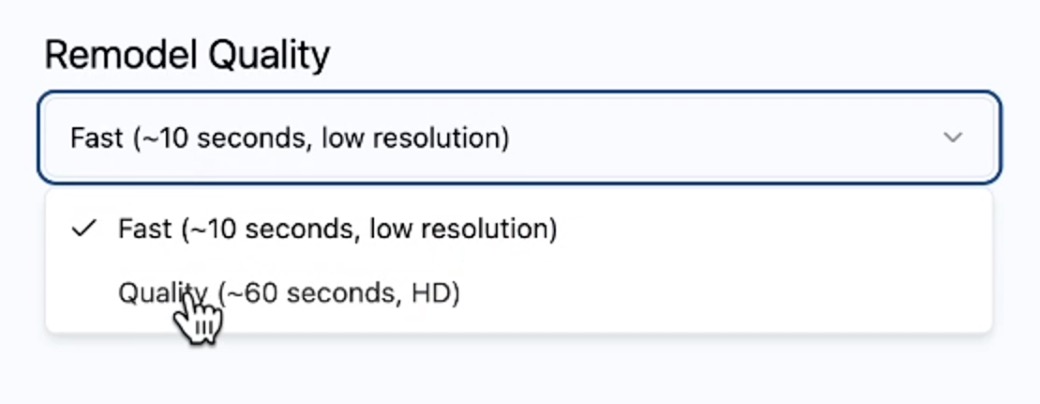
Adjust Quality Settings
For the best results, set the remodel quality to the highest setting. If you wish to remove a theme, simply click on it to deselect it.
Start the Remodel Process
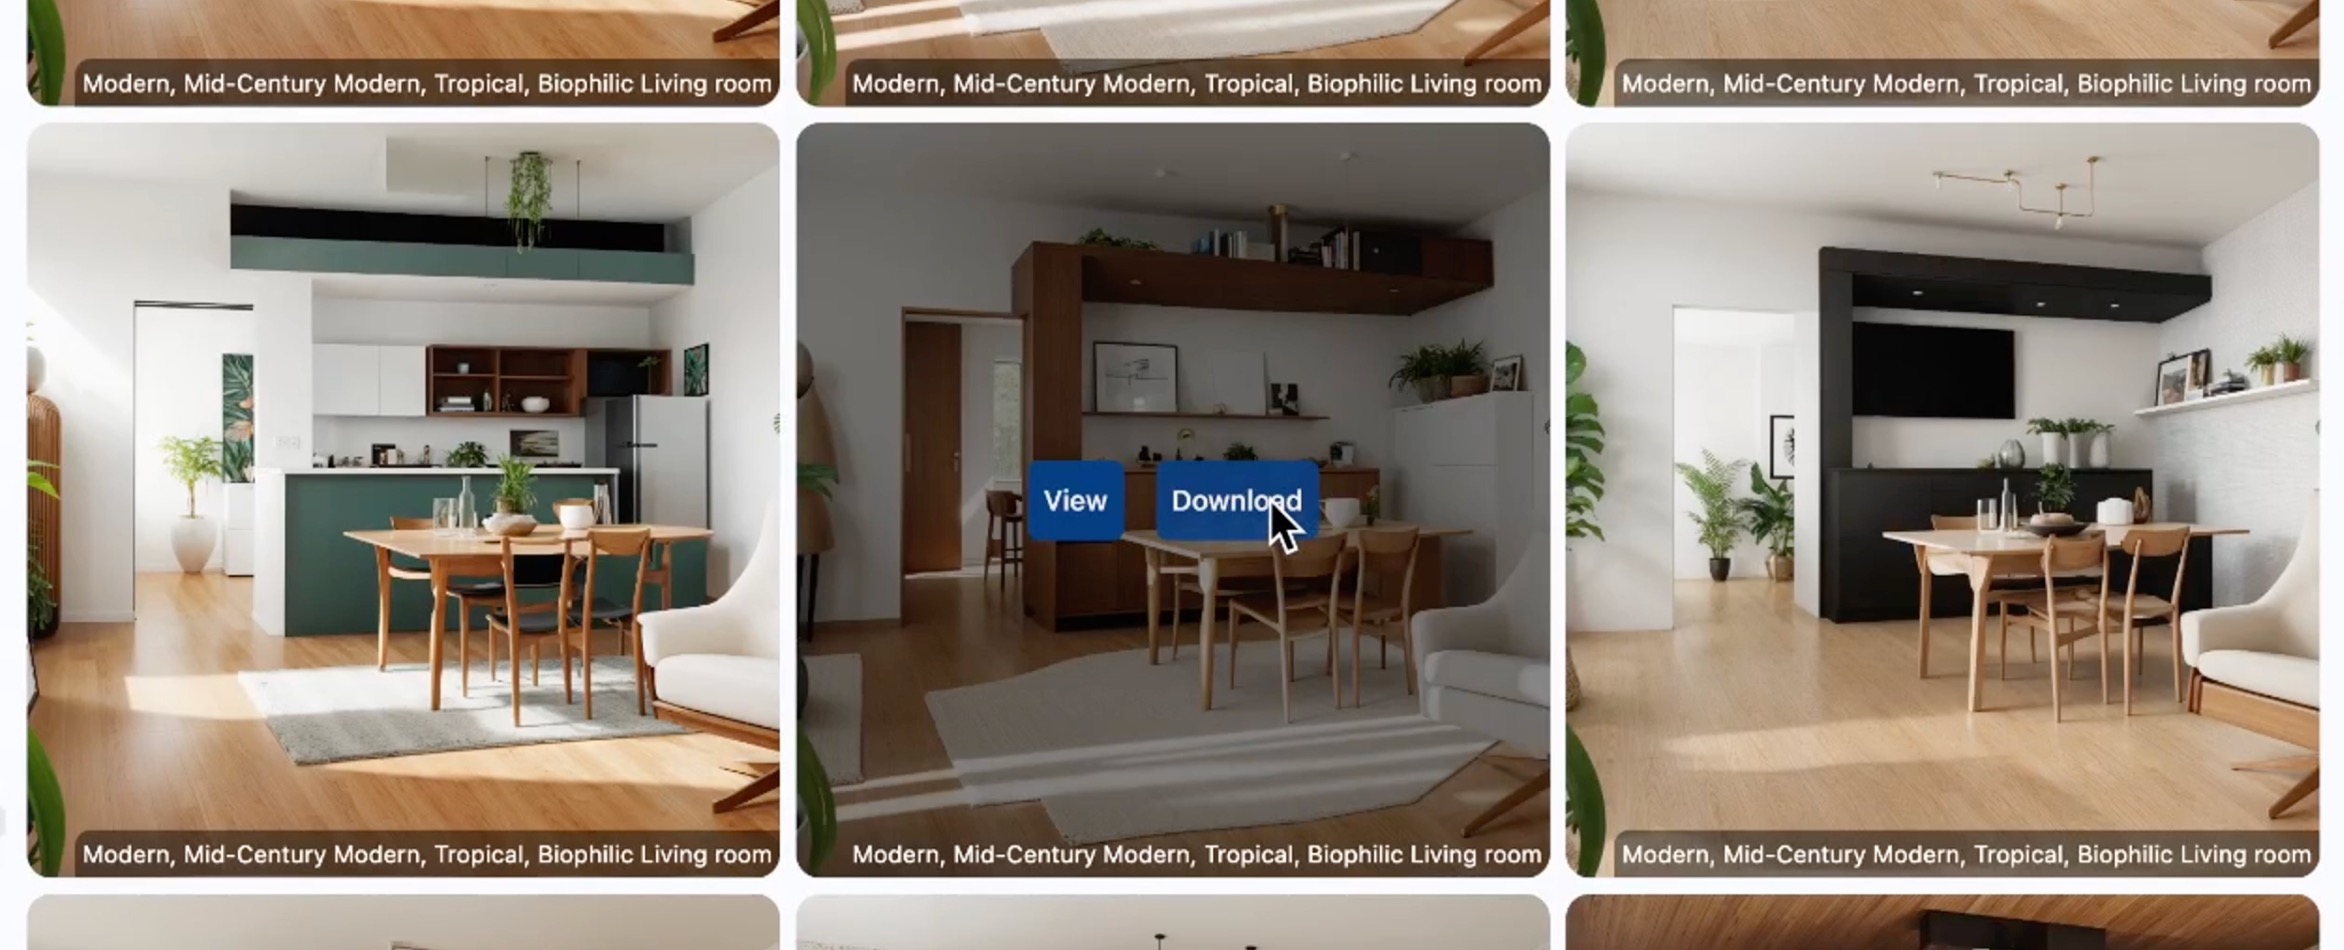
Click the remodel button and let the tool work its magic. You can remodel up to 8 times simultaneously to generate multiple options.
Review and Download Results
Step 2: Virtual Staging
Why Use Virtual Staging?
After remodeling, your room will have a fresh new look and structure, but the details and personal touches might still be missing. This is where Virtual Staging comes in. It allows you to add those personalized elements and fine-tune the design to fit your vision perfectly. While the Remodel tool gives you a solid foundation, Virtual Staging offers the freedom to customize and perfect every detail.
Navigate to the Staging Tool
Select the staging option from the left sidebar. Upload the photo you just downloaded from the remodel tool.
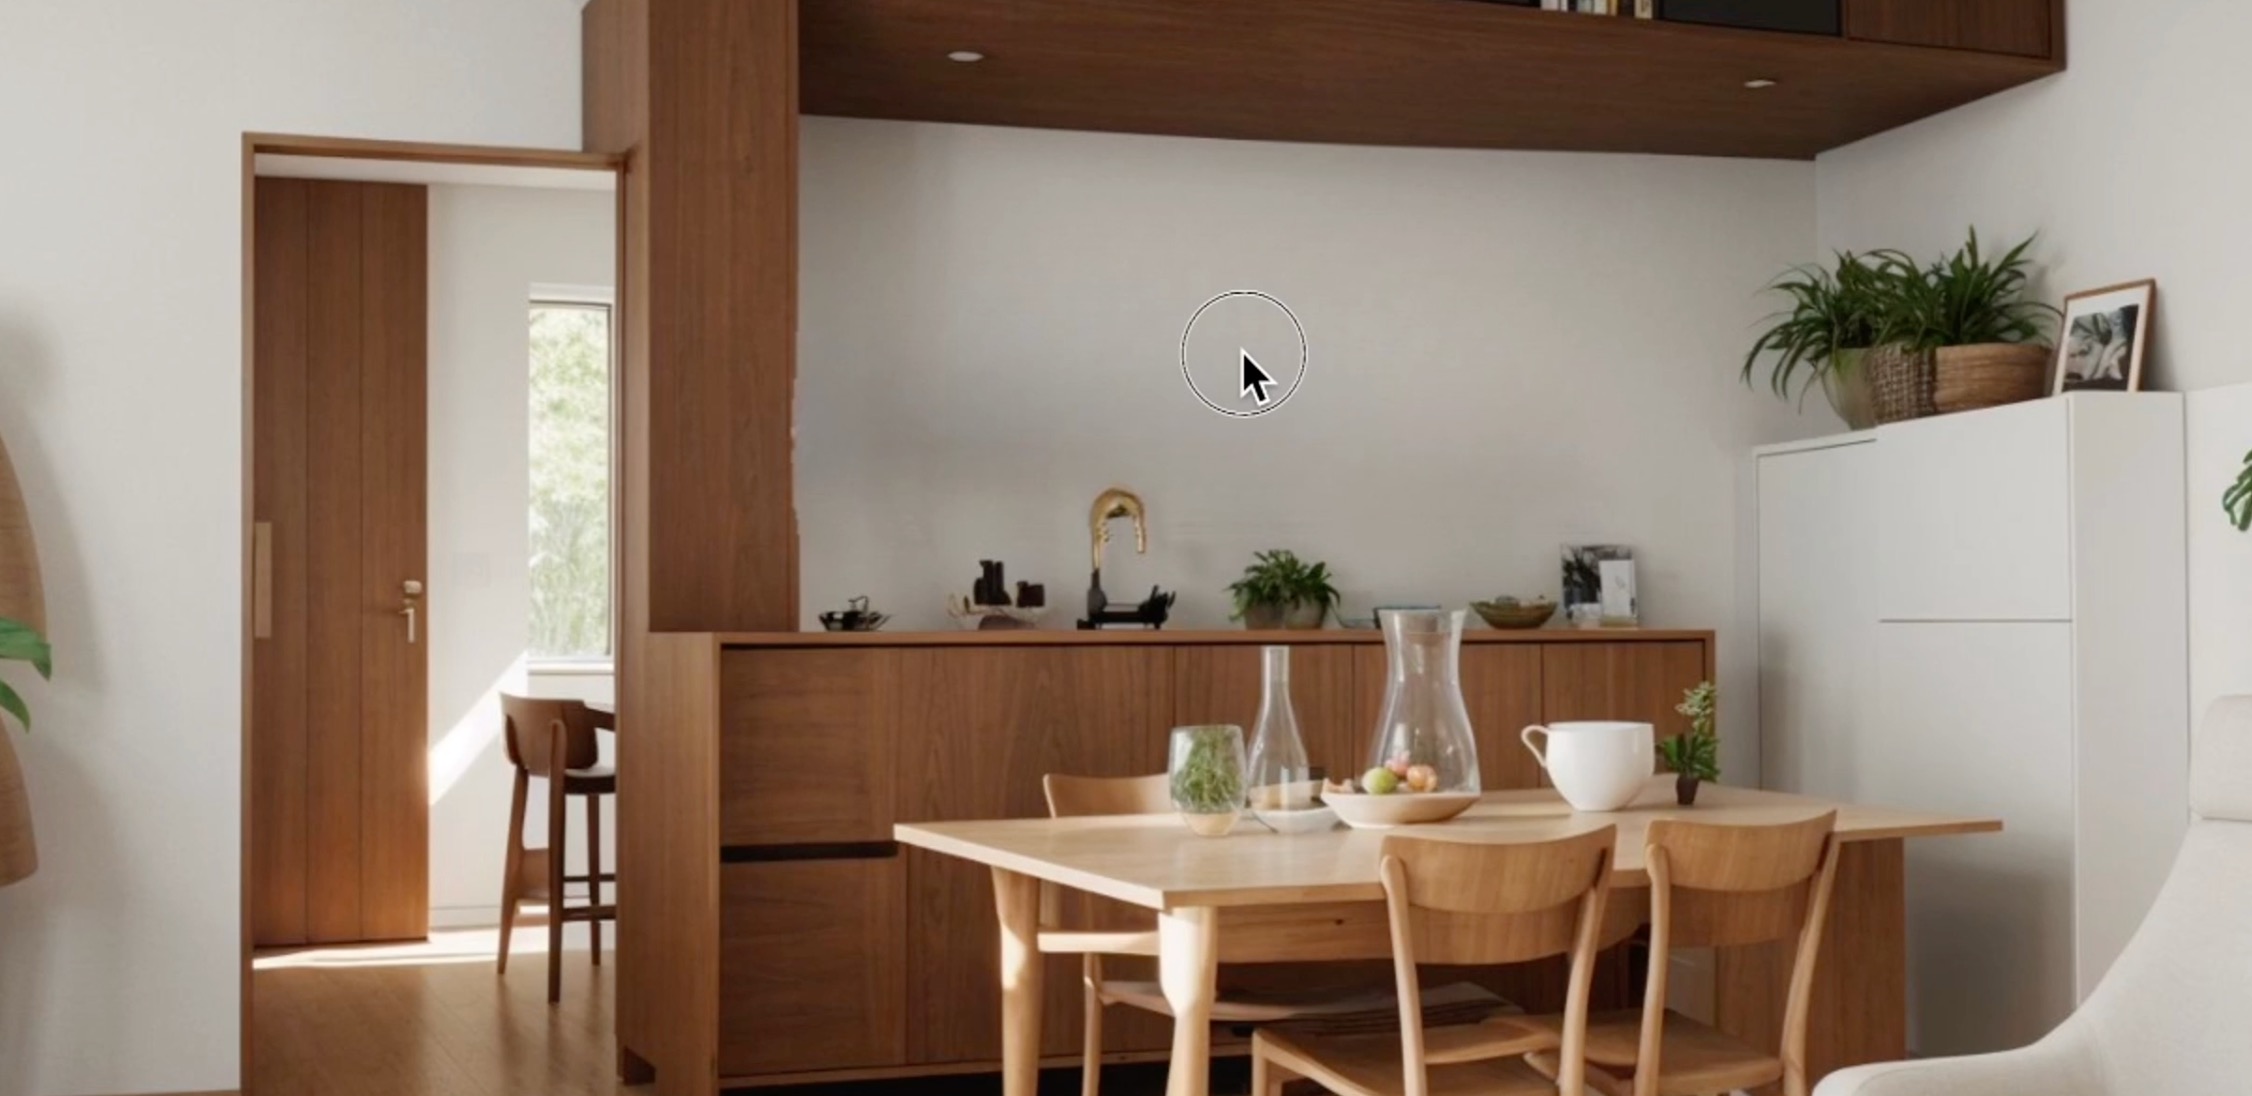
Make Changes with the Clean Feature
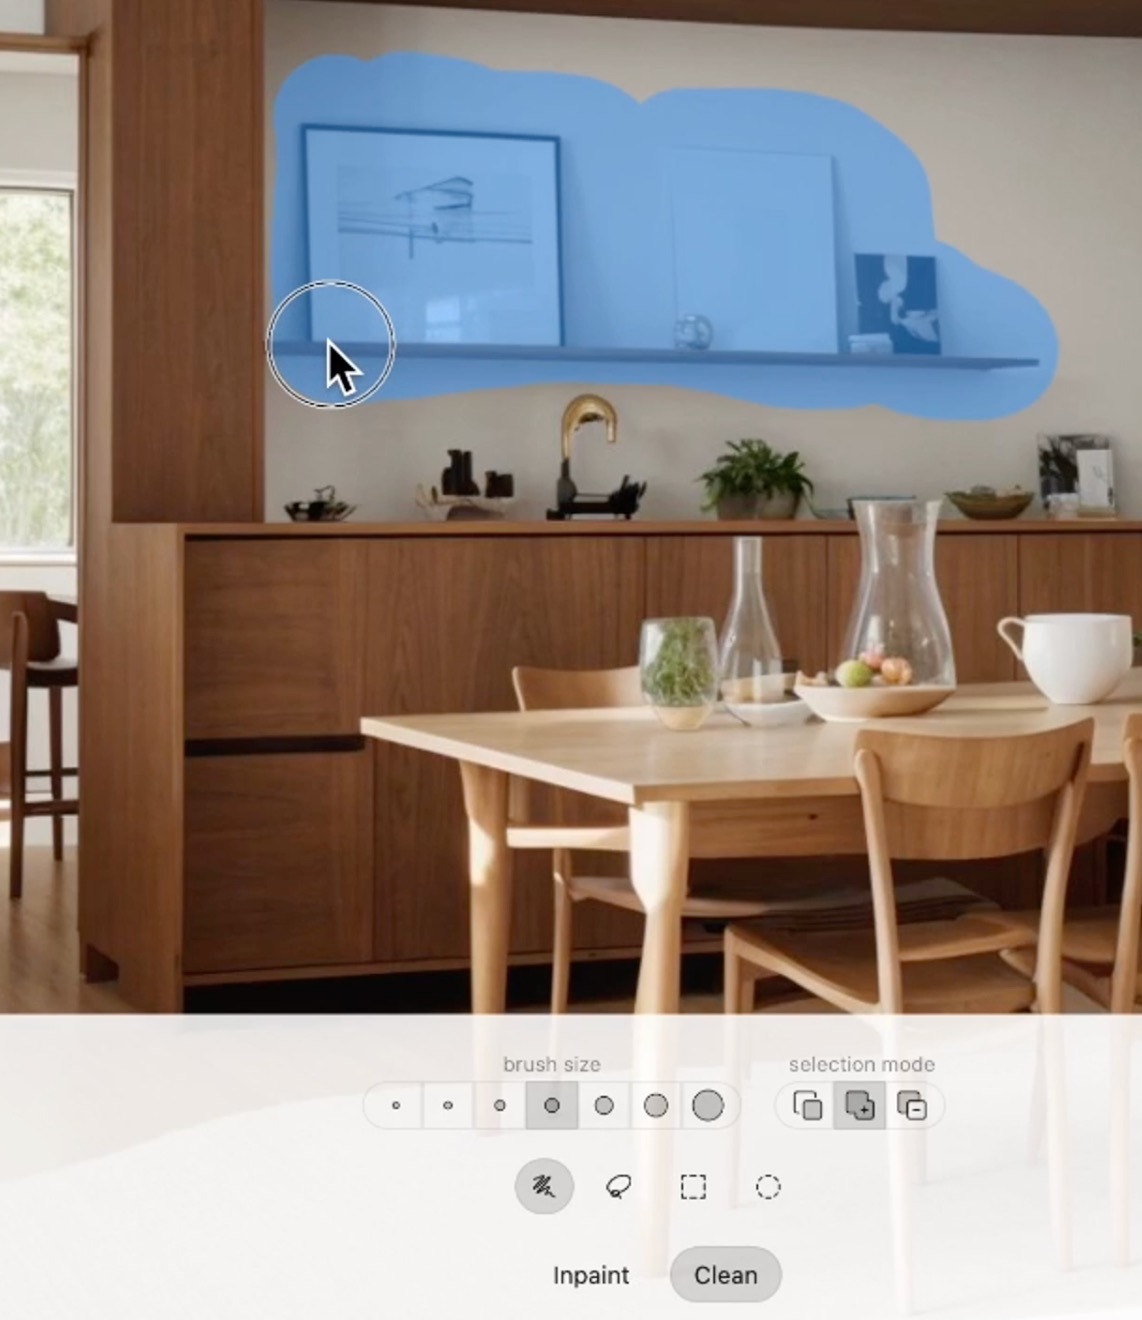
Zoom in on areas you want to change. For instance, remove an unwanted shelf. Select the clean feature, choose the appropriate brush size, and draw around the shelf to remove it. Ensure to provide context by including some background.
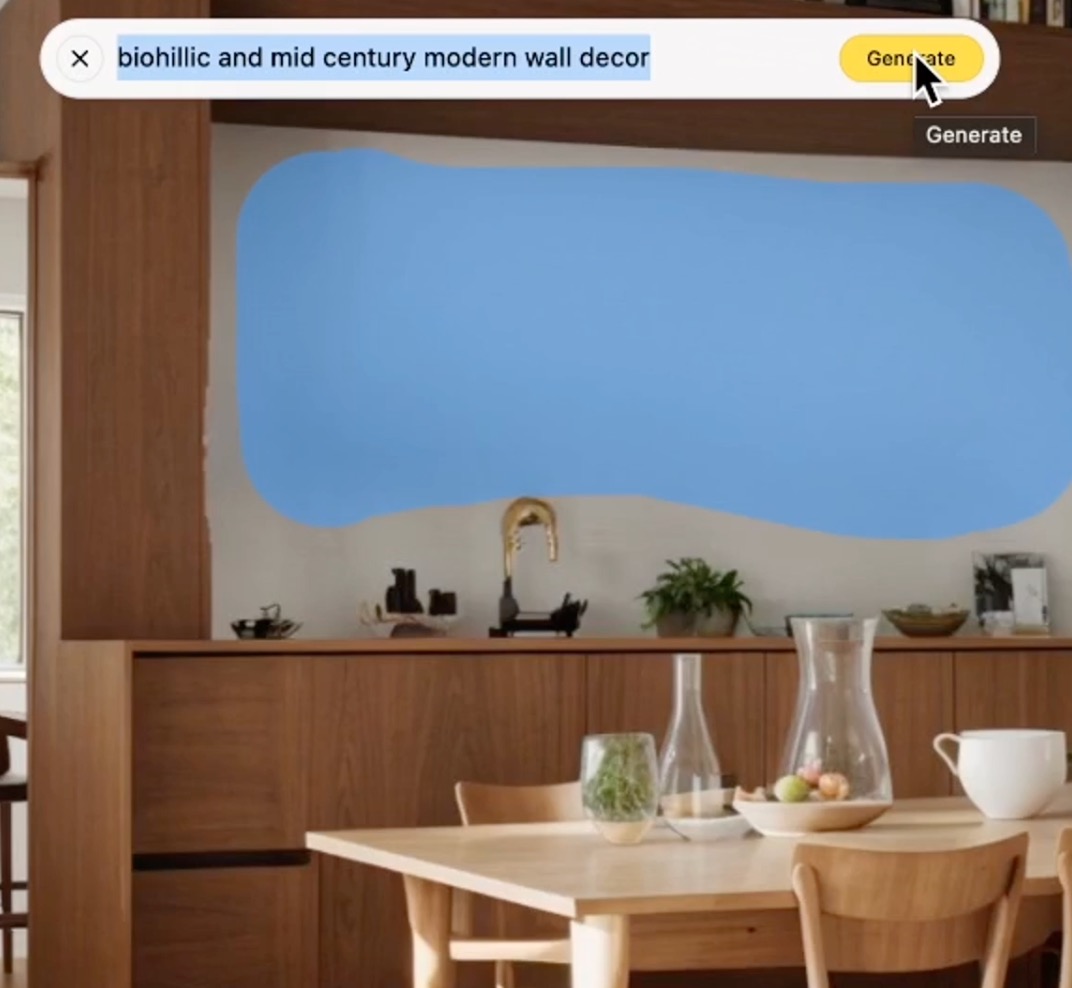
Use the In-Painting Feature
Once the shelf is removed, switch to the in-painting feature to fill the space. Describe what you want to add, such as artwork that fits your selected themes (e.g., biophilic mid-century modern). Hit generate and review the new options. If you’re not satisfied, you can refresh to generate more.
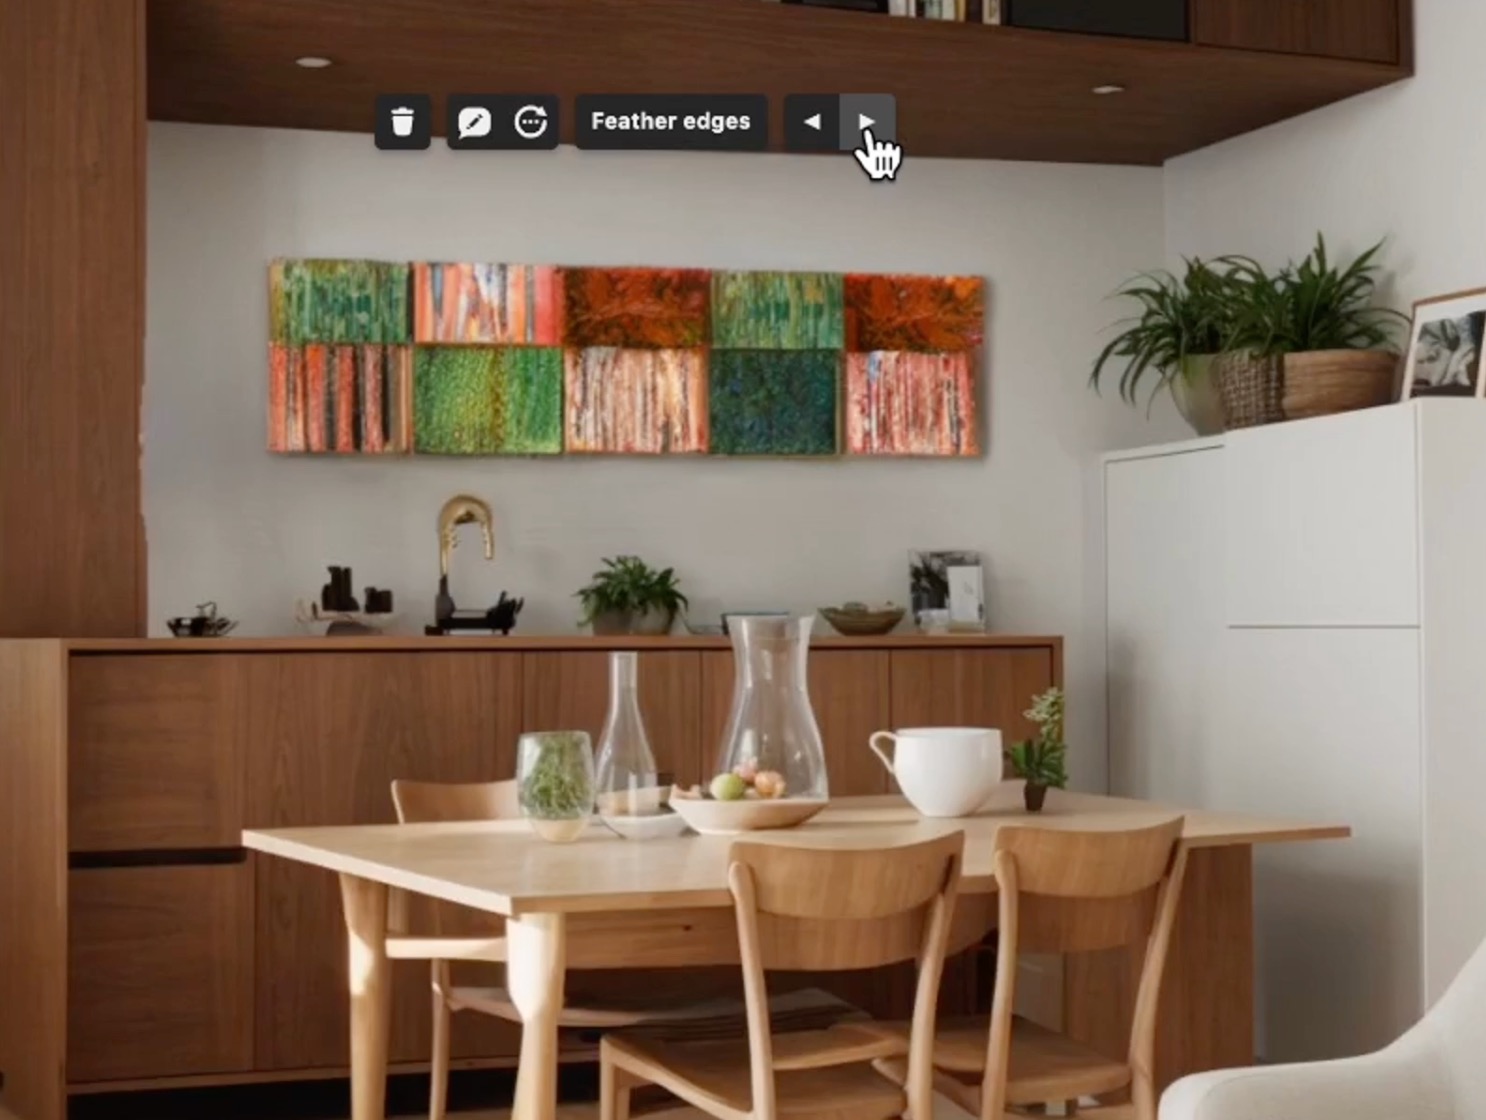
Finalize and Download
After making your changes, upscale the image to HD by hitting done. View your finalized room and download the image to your computer or phone.

With these simple steps, you can transform and stage any room to perfection using Remodeled AI. The combination of the Remodel tool and Virtual Staging provides a powerful and flexible way to achieve your design goals, ensuring every detail is just right. If you have any questions, feel free to contact us via the information at the bottom of our webpage. Thank you for choosing Remodeled AI!